As music production becomes more accessible, thousands of aspiring musicians, artists, students, and sound recordists worldwide are joining the ranks of new audio producers taking up the craft.
With education such as Music Technology and Audio Production BSc and Music Production Courses available across the UK, accessibility of producing music as a career has diversified the music industry almost beyond comprehension – and it’s enabled more people to get involved in audio production.
The Time to Start Producing Music is Now
It’s all because of the rise of digital gear – even top producers like Andrew Scheps (Red Hot Chilli Peppers, Adele, Metallica, Jay-Z, Bette Midler and many more) are now mixing ‘in the box’, meaning with just a computer and little to no outboard gear.
Analogue gear will always sound awesome and it’ll forever remain popular – it isn’t like the world’s biggest labels are going to ditch the recording studio for a laptop, but the point remains that pretty much anyone with a computer can get involved in music production today.
Producing music for beginners is not the mammoth task it used to be, nor does it require you to sell all of your possessions for a decent setup!
Competition amongst music technology manufacturers has driven prices lower and lower.
Meanwhile, the digitisation of music production means that you can run a top-notch studio from your own bedroom.
This guide is for anyone who is a music production beginner.
What do you need to own, and what do you need to learn to kickstart your music production journey?
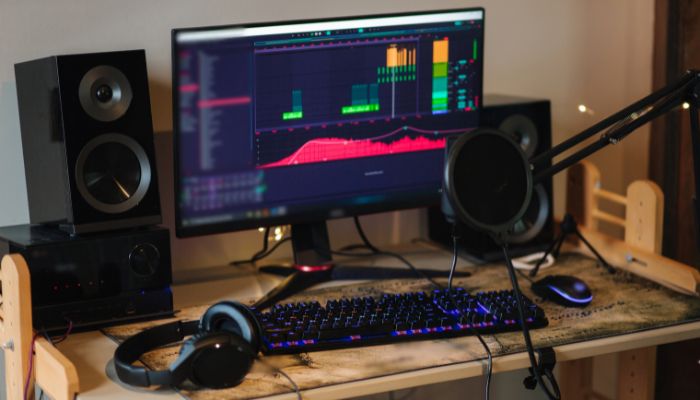
Part 1 – Music Production Equipment for Beginners
PCs and Laptops
Let’s kick things off with the gear you’ll need as a beginner music producer.
Starting with the essentials, you’ll need a laptop or desktop PC – either Windows or iOS – there isn’t a difference when it comes to compatibility.
Windows is more customisable and problems are more easily diagnosed, whereas Mac iOS is very efficient when it comes to music production and tends to ‘just work’.
As far as specs go, a decent Intel i5 or i7 CPU is a must. Don’t worry too much about graphics cards unless you’re processing a lot of videos or want to produce music for the film.
8GB of RAM is also highly advisable. 16GB would be much better. RAM is cheap to upgrade – well worth considering if you want to stick to your current setup.
It’s worth thinking about peripherals and accessories too. You’ll probably need a USB hub for connecting devices, MIDI keyboards, etc. Make sure you buy a powered USB hub – a normal one may not be able to power some hungry peripherals.
Audio Interfaces
Audio interfaces confuse many beginner producers. Why do you need an audio interface? Is an audio interface just a soundcard? Do you really need an audio interface?
Audio interfaces route instruments and mics into your PC for recording and playback through headphones and speakers.
Audio interfaces have I/O – inputs and outputs. They mediate the inputs and outputs between your PC and external gear.
You don’t necessarily need an audio interface if you’re not planning on using monitor speakers or recording sounds using microphones. You can still record audio without an interface if you have just a USB microphone.
Audio interfaces are however required for routing guitars, keyboards or any other line-level instrument into your PC for recording.
They’re useful to have and cheaper models like the Focusrite Scarlett range don’t break the bank.
Suggested Audio Interfaces for Beginner Music Producers:
- Focusrite Scarlett Solo
- PreSonus Audio Box
Monitor Speakers
Monitor speakers and audio interfaces go hand-in-hand.
Monitor speakers are specifically designed for accurate audio playback. Commercial speakers usually have various boosts to the bass, high-end, etc, to make tunes sound more fat and bassy.
That’s fine for standard music playback, but it’s not ideal for music production.
Monitor speakers produce a clear, balanced stereo image. This allows you to focus on what music and sounds really sound like in a neutral environment.
It’s worth mentioning that your room makes a massive difference to how well you can monitor audio. It’s worth investing in some basic soundproofing material if you’re producing music in a small space like a bedroom. Echoey, empty rooms can cause havoc for producers – imagine trying to produce music in a stairwell!
Suggested Monitor Speakers for Beginner Music Producers:
- PreSonus Eris E5s
- KRK Rokits
MIDI Controllers and Outboard Gear
Next, you’ll need a MIDI keyboard or pad controller.
MIDI controllers enable you to send data to your DAW’s software synthesisers, drum machines and other plugins. They’re inexpensive and plug into your PC or laptop via USB.
There are loads of options here. Some resemble keyboards but usually also feature touch-sensitive pads. Others resemble beat machines like the legendary Akai MPC.
Suggested MIDI Controllers for Beginner Music Producers:
- AKAI Professional LPK25
- AKAI Professional MPD218
- M-Audio Oxygen 25 IV
- Novation Launchpad
Digital Audio Workstations – DAWs
Your audio equipment will hook up to your DAW software.
DAWs include the likes of:
- Ableton
- Logic
- Pro Tools
- Fruity Loops
- Studio One
- Reaper
- Cubase
- Cakewalk
- Garageband
Beginner music producers can get a lot out of Garage Band, which is free (only available to iOS users).
Pro Tools First is another fully-free DAW – it just limits the number of tracks you can have in any one session.
Picking a DAW is one of the toughest decisions you make as a beginner music producer.
Roughly speaking, if you want to record acoustic music then Pro Tools is tough to beat – the premier choice of recording studios around the world.
Ableton has also cemented its place in the DAW Hall of fame – one of the most popular DAWs overall.
Fruity Loops will always have a die-hard contingent of long-term users, but it’s really progressed from its gimmicky style some decades ago and now rates a very solid DAW in every respect.
Logic is the logical progression for anyone using Garageband – there are a lot of parallels between the two.
It’s worth putting some time into researching the best DAW for you. Once you’ve created some projects on a DAW, it’s pretty difficult to transfer them elsewhere.
Plugins
DAWs are just workstations, and though they almost invariably come with enough plugins to get you started, you’ll likely need to add a few more to your arsenal.
When it comes to plugins for beginner music producers, there’s one plugin author that always pops up: Waves.
Waves have really monopolised the plugins industry. They have everything from plugin remodels of the world’s best analogue compressors to intricate synths cut-out for modern electronic music, tons of creative FX processors, audio editing tools, EQs, reverbs, and everything.
Waves also offer plugin packages or deals, large bundles of some of their most popular plugins.
Music production beginners should strongly consider the Waves Gold plugin bundle. Waves Gold is often recommended to music production and engineering students – it contains 40 excellent plugins.
Waves Platinum is the next tier up from Gold with 60 plugins, and then there’s the Mercury bundle with over 170 plugins!
Waves run tons of sales and deals – building an impressive selection of Waves plugins is very cost-effective for newbie producers.
Aside from Waves, there are a few other ubiquitous plugins that can be recommended to music production newbies:
- Native Instruments Massive – Software synth ideal for electronic music
- Xfer Records Serum (similar to Massive in many ways – One of the most popular soft synth plugins)
- Baby Audio Spaced Out – Very intuitive and cool plugin for all types of music production
- Izotope Ozone and Neutron – For mixing and mastering your productions
- Fab Filter Pro-Q and Pro-C – EQ and compressor plugins from Fab Filter
If you’re looking for free plugins then you’ll find plenty in the VST format (not compatible with Pro Tools).
Switching on your Gear
Once you’ve connected your gear, you’ll need to get a signal through your entire rig.
Audio within your DAW should be played back through your monitors and any headphones connected to your audio interface.
Any instrument or mic connected to your interface should produce a signal in your DAW. You’ll need to load up an audio track, assign the mic input and then arm the track (often by ticking a red record button). You should then be able to record audio.
Software instruments are usually loaded onto ‘instrument tracks’ instead. You should be able to load a software synth onto an instrument track and control it using your USB MIDI controller.
If you can’t get things to work then don’t panic – there’s always a solution.
Once you’ve dealt with an issue once, you won’t need to deal with it again.
The course of music production did never run smooth – troubleshooting is unfortunately part of the deal!
Part 1 Summary: Music Production Equipment for Beginners
- Start with a solid PC or laptop
- Audio interfaces are not 100% essential but strongly advised
- A good pair of monitors cannot be equalled by standard speakers or headphones
- MIDI controllers allow you to control and record software instruments inside your DAW
- Your DAW is really important – choose one that suits your genre of music and user interface tastes
- A good selection of plugins will help get the creative juices flowing
- Make sure everything switches on and works!
Part 2 – Inside the DAW
Different Types of DAW Tracks
Inside a DAW, you’ll typically have access to 4 different tracks that all have different uses.
Some can be created in mono or stereo (e.g. audio tracks and busses) whereas others can only typically be created in stereo (e.g. instrument tracks and the master fader).
- Audio tracks – In most DAWs, audio tracks are tracks that you can record on or insert loops on. They’re the most basic form of multi-purpose audio track.
- Instrument tracks – In some DAWs, instrument tracks are specifically for software instruments, e.g. synths and drum samplers. They’re identical to audio tracks but display MIDI note information (e.g. as blocks on a piano roll) rather than waveforms.
- AUXs and Busses – AUX sends are used to send signals elsewhere in your DAW, typically to a bus (also known as an AUX track in some DAWs). A bus is a collection of signals. For example, if you record a drum kit with 8 microphones, you’ll have 8 individual tracks – that’s pretty cumbersome when it comes to mixing and processing your drum kit. You can send all 8 of these audio tracks to a single drum bus. You can then process the entire kit from the bus. Think of it as a single collection of multiple tracks.
- Master/Mix Bus/Fader– Your master bus (aka. Mix bus or master fader) is your main output. The vast majority of sounds are created in stereo, so the master bus has a left and right channel like any other stereo audio channel. The master bus is the final channel in your DAW, representing the sum of all your tracks.
Panning, Levels and Headroom
Each track is controllable in two fundamental ways:
- Panning alters how much signal is distributed to the left or right channels. In the case of stereo tracks, there are two panning faders. Mono tracks have just one.
- The channel fader itself alters the volume of the track. This lets you control the headroom in your mix.
One of the most important yet confusing concepts in music production is headroom.
In old analogue gear and mixing desks, if you overpowered a signal, you’d literally overload the circuity of your equipment. This causes distortion – many distortion effects were originally produced by literally overdriving analogue tubes.
The concept of headroom still exists in digital audio production. Each channel has a ceiling. If your audio signals exceed that ceiling, they’ll clip.
Clipping results in distortion and other digital audio artefacts. Essentially, each track can only take a finite amount of signal.
Some sounds create much greater signals than others. A very heavy bassline produces a much greater signal than a hi-hat at an equal volume. You’ll need to be aware of not clipping your tracks – keep them in the green until mixdown.
The same applies to the master fader. High levels on the master fader are not necessary until the mixing and mastering stage of production. Keep things nicely in the green, just encroaching into the yellow.
This might be difficult with certain sounds, e.g. transient sounds (like a snare drum hit).
Compression and limiting help control these transient sounds to keep overall levels even – more on that shortly.
You can place a limiter on your master fader to prevent any transients from clipping – a limiter literally limits the signal before it clips. Clipping your faders won’t cause any damage, but it’s a bad mixing habit that you want to avoid. Keep levels low and raise them when you come to mix your song.
The difference between quiet and loud sounds in your track is called the dynamic range, related to the concept of headroom.
- A jazz track, for example, will have a low overall level with a large dynamic range – there’s a big difference between the quiet and loud parts of the song.
- An electronic music track will have a high overall level with a narrow dynamic range – the whole song is loud and consistent throughout.
Part 2 Summary: Inside the DAW for Beginners
- DAWs often have a mix area (with your channel strips) and an edit area/track view (with your MIDI and waveforms)
- Get familiar with your channel faders and panning
- Plugins are usually placed as an ‘insert’ on a track
- Headroom refers to the dynamic range of your channels
Part 3: Sound Design For Beginners
Experimenting with Loops and Samples
Loops and samples are an excellent starting point for experimentation within your DAW.
You can download loops and samples for free from:
- Freesound.org
- Looperman.com
You can also find tons of free sample packs for almost any genre of music.
Start off by loading some drum beats onto stereo audio tracks. Loop a drumbeat over 16 or 32 bars and experiment with your plugins. You’ll probably get instant inspiration – things often develop from there!
Experimenting with software synths over a pre-made drum loop is a solid starting point for any track.
Learn how to quantize loops and samples in your DAW – that means conforming loops with varying tempos to the same global tempo. Quantization varies between DAWs but generally, you’ll quantize the audio on a track to the tempo of the project. This keeps everything synced together.
Reverb, Delay and other FX
The usefulness of reverb is often underestimated.
Using reverb properly can provide depth and width to your track, opening up sounds so they span the stereo field and frequency spectrum.
Delay can also help provide movement to your tracks, making them appear more three-dimensional.
Both of these concepts relate also to stereo width. You might hear a lot of producers asking about how to create a wider mix that really spans the entire stereo field.
Reverb and delay can both assist in that, but there are many purpose-made plugins designed for widening tracks.
Other FX like distortion, modulation and other weird and wacky plugins are all pretty intuitive – they’re best learned through experimentation.
Part 3 Summary: Sound Design for Beginners
- Experiment with free loops and samples
- Quantize your loops and samples to your session’s tempo
- Plugins are generally intuitive and straightforward to use, browse the presets for each plugin to get a feel for how it works
- Don’t sideline reverb and delay – you can use it both subtly and creatively
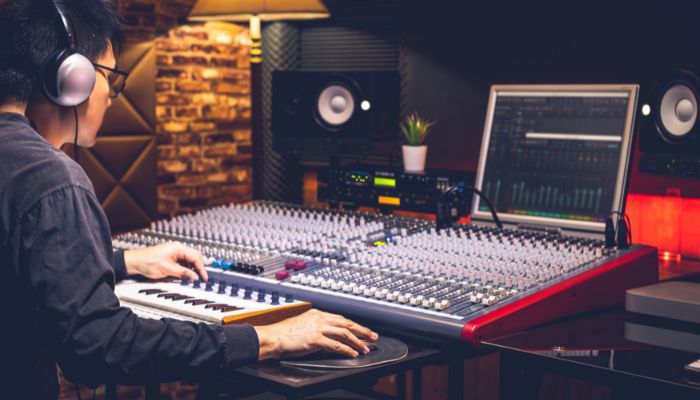
Part 4: Mixing and Mastering For Beginners
Mixing and mastering – two intimidating words for many music producers, no matter how skilled and experienced you are!
Luckily, modern mixing tools and plugins have made mixing and mastering simpler. Namely, Izotope Ozone and Neutron have revolutionised the mixing and mastering process, enabling producers to execute professional mixes from DIY bedroom studios.
Mixing revolves around EQ, compression, panning and effects.
The goal is to achieve a balanced mix with a diverse palette of sounds distributed evenly across the stereo field.
EQ and Compression 101
EQ and compression are some of the ‘dark arts’ of music production – they intimidate a lot of new producers.
In reality, the concepts behind EQ and compression are pretty straightforward.
EQ
The audio spectrum spans 20Hz, the lowest and bassiest sound we can physically hear, to around 20kHz, the highest sound we can hear.
Music and other audio typically involve frequencies across this entire spectrum.
Sub-bass can be produced as low as 20Hz – so low that we feel it rather than hear it.
No one part of the frequency spectrum sounds good, or is useful when isolated from others.
Generally, a balance of frequencies is required to create warm, balanced and detailed audio.
If you load an EQ onto a track and add a steep boost, dragging it across the frequency spectrum, you’ll notice how some frequencies sound nasty.
Other frequencies might sound warm or crisp containing the ‘substance’ of that sound or noise – the good bits.
The broad purpose of EQ is to balance your audio across the frequency spectrum, the aim is to feature a blend of frequencies that create a nice, even and balanced tone.
EQ allows you to remove clashy frequencies to help sounds sit better in the mix.
For example, the cymbals of a drum kit might really interfere with a vocal part.
By cutting the high frequencies of the cymbals in say, the 4kHz region, the vocals might reveal themselves and cut through the mix.
EQ should be mostly subtractive – it’s about removing frequencies that you don’t need rather than adding new frequencies using the EQ. A major example is clashing bass – remove the bass from instruments that don’t need it to create room for the instruments that do.
This is a golden rule for beginner music producers – focus on EQing out frequencies to carve room for the instrument/sound that you want to occupy that area of the frequency spectrum.
Compression
Earlier, we discussed headroom.
Negotiating headroom is a challenge for audio producers – tracks typically contain audio of vastly varying volume.
Take a vocal part – the singer may be consistently quiet until the chorus where suddenly they raise their voice. If you raise the overall volume of the vocal part so you can hear the verse, the chorus will probably be way too loud – it could clip the track. But if you leave it, you can’t hear anything but the chorus.
It’s the same story with different instruments. Drums are a classic example – a snare drum hit could be many times louder than the average volume of the track.
Compression tackles these problems. Compression, like EQ, really does what it says on the tin.
A compressor lowers the volume of the loudest parts of a track, compressing them together with the quieter parts of a track.
This reduces the overall dynamic range. Compress too much and you’ll squash the track completely.
Mastering 101
Mastering puts the finishing touches to a track.
Mastering concentrates on the master output. Mastering aims to maximise the qualities of the mix, usually whilst bringing the overall level up, making a tune sound louder, fatter and wider whilst remaining balanced.
Mastering has undergone massive changes in the 21st century with artists and producers trying to maximise the loudness of their tunes – also known as the loudness wars.
Some genres, like EDM, really hinge around the creation of super-loud masters. When your song is dropped in a mix, it needs to be loud and punchy. This involves the use of multi-band compression, EQ and limiting.
Beginner music producers shouldn’t overthink mastering. Sound design, composition and mixing always come before mastering.
If you delve too much into mastering before exploring the basics of audio production, you’ll probably waste time fixing problems in the master that should be fixed in the mix or the composition of the track itself.
Focus on building awesome tracks, experiment with plugins, EQ and compression.
Once you’ve got some solid projects completely finished, start digging into the mastering process.
Part 4 Summary: Mixing and Mastering for Beginners
- Mixing mostly revolves around EQ, compression and panning
- Compress tracks with vastly variable volumes and lots of transient sounds
- Focus on EQing subtractively – remove frequencies to carve space for every sound in your mix
- Don’t overthink mastering when you’re starting out in music production – focus on creating balanced tracks that sound good on their own with plenty of headroom
Summary: Music Production for Beginners
Music production is engrossing, fun and addictive.
Start off by nailing down a solid setup – building a production rig that runs smoothly in the way you expect it to is extremely helpful and will fuel your productivity.
Once you get used to your DAW and start to dig and experiment, the creative process usually unfolds from there.
Beginner music producers shouldn’t overthink the technical aspects of music production, so long as you have a grasp of headroom, EQ and panning, you can create some great-sounding tracks that make further mixing and mastering so much easier.